Hello World
In this first tutorial, we will start by creating a simple implementation class with the humble functionality of blitting an image to the screen. Follow the links for the classes and methods on this example to check their full documentation.The code for this tutorial can be found in the \examples\helloworld directory of the Easy2D distribution.
You may want to rip this image to use in this example:
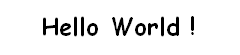
This is actually an image, not text. Save it to your disk, we will make Easy2D show it in your screen.
To make this possible, we must implement a game. Easy2D provides the class Implementation, from which you must inherit and create your own implementation of a game. Take a look at the code below:
file game.hpp
#include "easy2d.hpp"

using namespace e2d::core;
using namespace e2d::graphics;

class MyGame: public Implementation
{
private:

   Image* image;

public:

   MyGame();

   void OnInit(Utilities* Utils);
   bool OnRun(Utilities* Utils);
   void OnQuit(Utilities* Utils);
};
In this source file called "game.hpp" we have created a class called MyGame, a child of Implementation. Since its parent has pure virtual methods (OnInit, OnRun, and OnQuit), we must implement them, so here we declare their signatures.
The class MyGame has one attribute named "image", that is a pointer to Image. We will use it to load and blit the Hello World image.
Now let's see the implementation of this class. Don't worry, we will cover every method in detail later:
file game.cpp
#include "game.hpp"

using namespace e2d::core;
using namespace e2d::graphics;

MyGame::MyGame()
{
   image = NULL;
}


void MyGame::OnInit(Utilities* Utils)
{
   Utils->Video()->Init(640, 480, 24, Video::WINDOWED);

   image = new Image();
   image->Load("hello.png");
   image->SetPosition(200, 200);
}


bool MyGame::OnRun(Utilities* Utils)
{
   image->Blit(Utils->Video()->GetFramebuffer());

   Utils->Video()->SwapBuffers();
   return true;
}


void MyGame::OnQuit(Utilities* Utils)
{
   delete image;

   Utils->Video()->Quit();
}
Let's begin by the constructor. No problem here, right? Just make all your pointers point to NULL, that's a good practice.
Now comes the OnInit method. On the first line, we initialize the video. As Init is called, it is going to create a window with a size of 640x480 pixels (not fullscreen). In the next two lines, we create an instance of Image and then load the image you saved earlier to your disk. The path to the image file is relative to your executable file, so for this example to work, both must be in the same directory. Last line, we set the coordinates we want to blit the image to the screen. In this example the image will be blitted having its most upper-left pixel at position (200, 200) relative to the upper-left corner of the application window.
Method OnRun, here is where the whole magic happens. First, we blit (make a pixel-by-pixel copy) the image into the framebuffer (the screen). This means that the image data was put inside the video memory, and will appear on screen. Right? Well, not really... Easy2D uses a technique called double-buffering, where all blit operations happen on a back buffer. For them to appear on screen, you must swap the front buffer with the back buffer, calling SwapBuffers.
Easy2D will keep calling the OnRun method while it returns true. It means that your image will be drawn over and over to the back buffer and will be flipped to the front buffer to appear on screen, indefinitely. We have created an infinite loop, and that will hang our system running this forever. Oh, my! But don't worry, that's why we have made this a windowed application: if you close the window, Easy2D will intercept that event and break this loop, performing then all necessary cleanups, including a call to your OnQuit method. Note that, in real applications, you shall make this method return false when your game ends.
Inside OnQuit, we perform an elegant clean up of our stuff. Delete all previously allocated pointers, and close the Video subsystem. It is really important to do it now, so no memory leaks or segmentation faults are going to haunt us in the middle of the night.
And there it is, our first demo! Now all we need to do is get it up and running. Here is where comes up the GameApplication class. It will run our game for us. See the code below:
file main.cpp
#include "easy2d.hpp"
#include "game.hpp"

using namespace e2d::core;

int main(int argc, char** argv)
{
GameApplication* app = GameApplication::GetInstance();
MyGame game;

    app->Execute(&game);

    return 0;
}
Easy, huh? Just make an instance of your game and pass it as a parameter to the Execute method. This will make Easy2D call the three methods you have implemented (OnInit, OnRun, and OnQuit) in this order, and your game shall run shiny and bright. I mean ... it's not a game, just a Hello World, but that's how it all begins, ain't it ?
This is the end of our first tutorial. I hope that, after this, you were able to understand the basic functionality of Easy2D. If you have any questions, feel free to join our mailing list, or post on the forums (all facilites of sourceforge.net). See you next tutorial!